
I have a very exciting post to share with you today! If you love DIY's and you love texture polish, then I hope you'll love this post! Keep reading to learn more!

If you like textured nail polish, then no doubt at one point you have thought to yourself "I wish I could find such-and-such color as a texture polish." Well wish no more! The other day I found myself thinking the same thing, and realized I could probably create my own textured topcoat. Sure, you can buy one like the one Essence makes (which I decided was too hard to find and buy so I didn't bother). Or you can do what other ladies have done and use either salt, sugar, or embossing powder on wet nail polish. And while these all give a pretty cool textured effect in the end, I wanted something a little less messy and more self-contained. So I started with the embossing powder idea and evolved it a bit!

I wanted to use embossing powder because it's essentially tiny grains of plastic, and I figured it would be more stable than salt or sugar if added to a topcoat in a bottle. So I went to Michaels (it bothers me that the proper name of the store has no apostrophe, is it just a place to buy many people named Michael? NO!!! *end of grammar rant*) and bought this little jar of clear embossing powder for $4.29 including tax. It was the smallest individual jar I could find, and I wanted to use clear so that it wouldn't change the transparency of the topcoat. The topcoat I started with was NYC Grand Central Station fast dry topcoat, since I had a spare bottle on hand for nail art and such.

Then came the tedious part: experimenting and testing and mixing and all that fun stuff that comes with the territory of making your own polish. To start, I decanted about 1/4 of the topcoat into another empty bottle. Then I very slowly and gradually, with much mixing in between, added embossing powder to the original bottle of topcoat. I also added a spare mixing ball and that helped the mixing part a LOT! The polish started getting a little thick and goopy, so I added a bit of polish thinner. But then it was too thin and the texture wasn't as pronounced as I would have liked, so I added more embossing powder. This went back and forth until I had approximately one part powder to three parts topcoat.
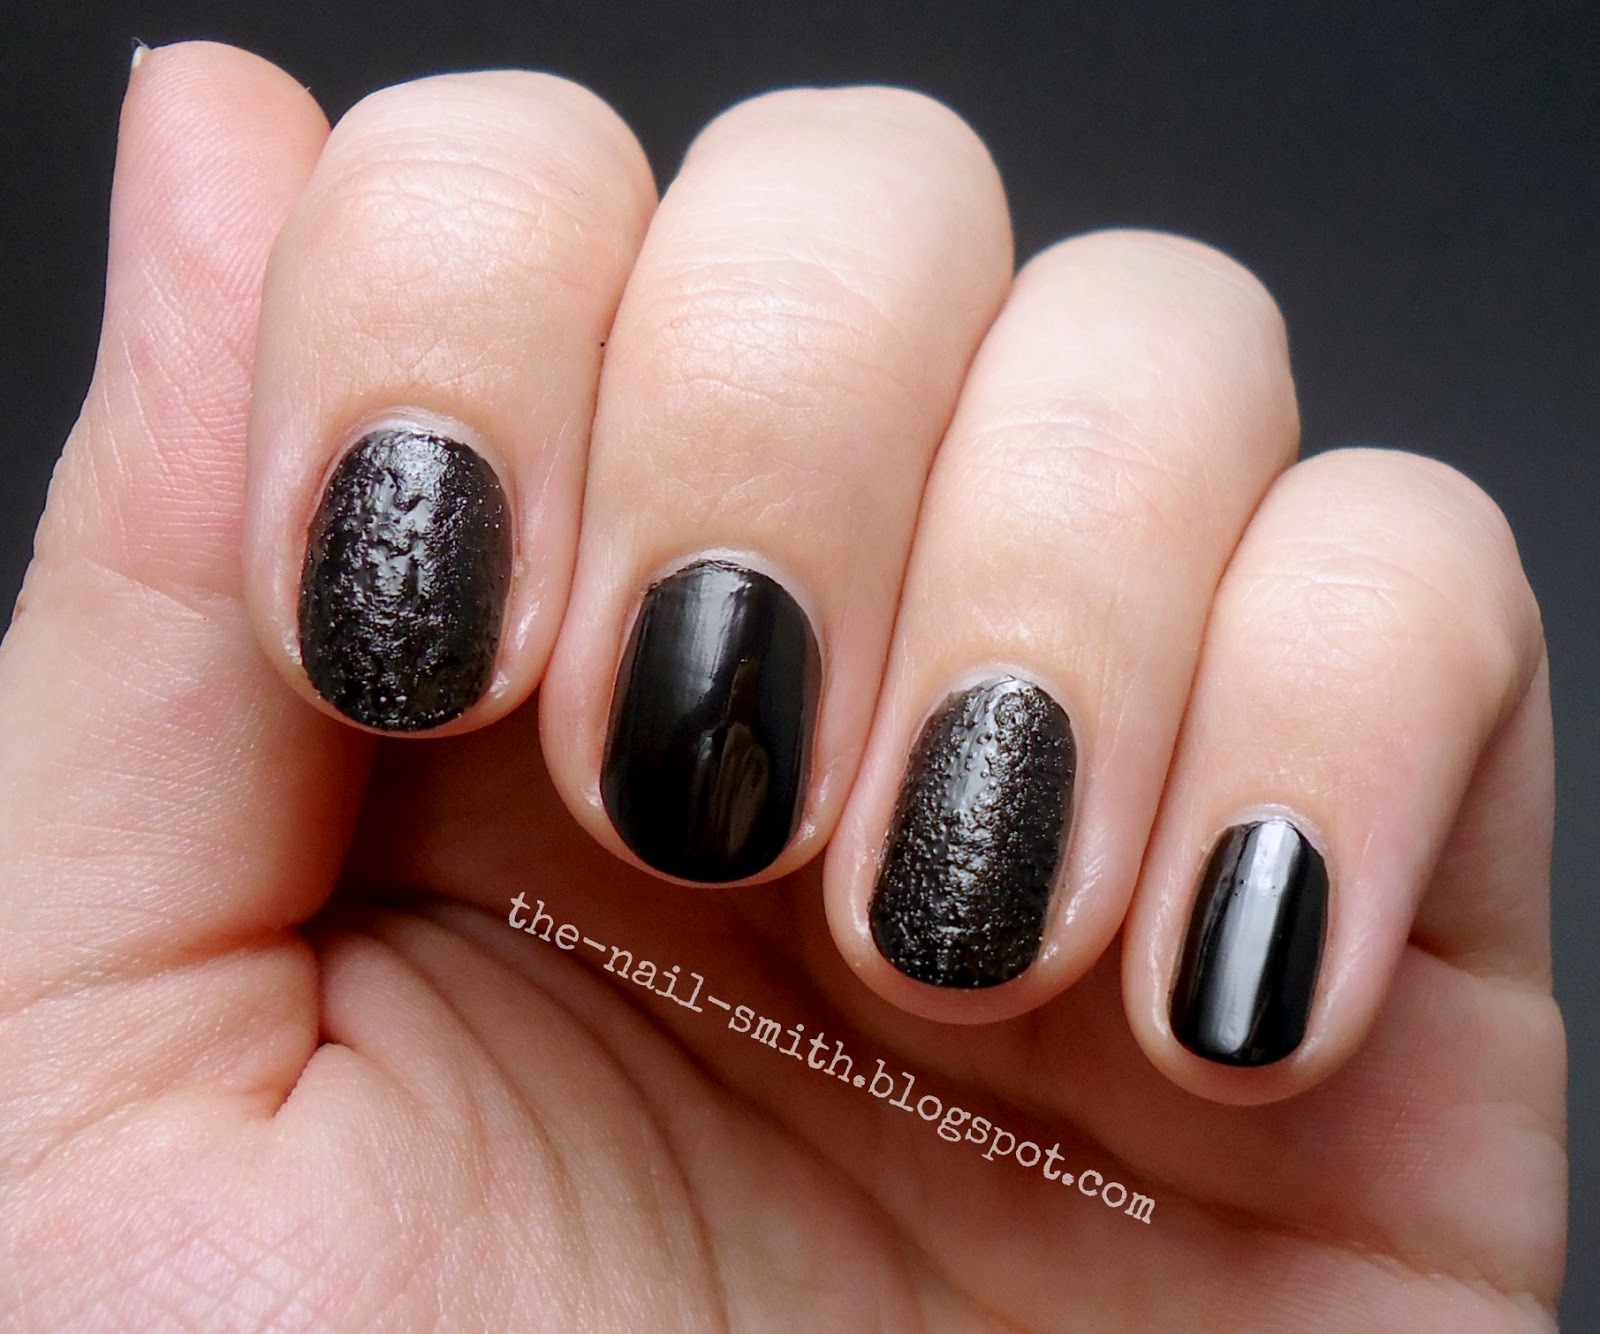
Even though it ended up being fairly thick, I actually prefer it like this. I found that if I use almost a dry brush technique with it, I can get pretty much the exact texture I wanted! And in a blind-touch comparison with Milani, OPI, and China Glaze textured polishes, my topcoat feels pretty much the same! I was (and still am) SO EXCITED about this! I even discovered that if I apply it on top of nail art, the details underneath are in no way altered! Although it does help to apply a regular fast dry topcoat before topping with my DIY one to prevent any possible smearing. Plus it dries super fast since it's made with NYC GCS. I named my texture topcoat Beached to match the summery themed names of all my other frankens. In the pictures here I have one dry-brushed coat over two coats of Wet n Wild Black Creme on my index and ring fingers, compared with two coats Black Creme on their own on my middle and pinky fingers.

Overall, I'm extremely pleased with how this little DIY project of mine turned out! What do you all think? Is it dupe-worthy? Something you wanna tackle yourself? I'm really eager to hear what people think! Oh, and I think you can definitely expect to see some more textured looks from me in the future! Thanks for stopping by!

No comments:
Post a Comment